Thermostatic mixer shower with diverter Installation and operating instructions
Thermostatic mixer showers with diverters have become a popular choice for modern bathrooms, providing a convenient and efficient way to enjoy a customized shower experience. In this guide, we will delve into the installation and operating instructions for these advanced shower systems, ensuring that you get the most out of your investment.
Understanding Thermostatic Mixer Showers
Thermostatic mixer showers are designed to regulate water temperature consistently, offering a comfortable and safe bathing experience. With the added feature of a diverter, users can easily switch between different shower functions, adding versatility to their daily routine.
Key Components of a Thermostatic Mixer Shower with Diverter
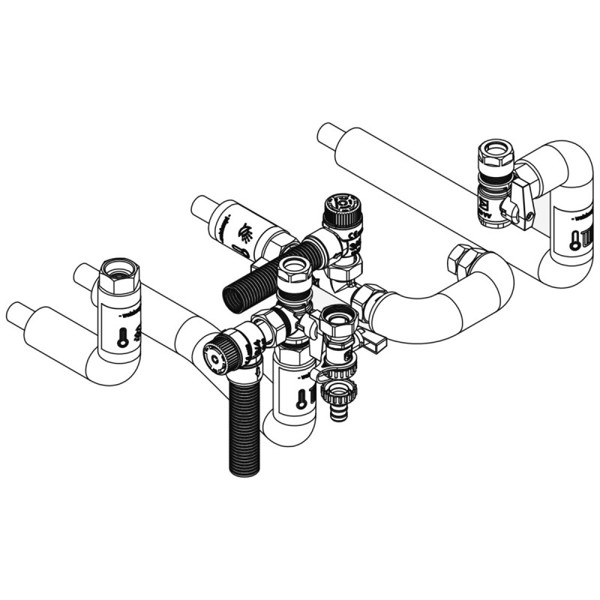
Before diving into the installation process, it's essential to familiarize yourself with the key components of a thermostatic mixer shower. The valve, temperature control, and diverter are integral parts that work together to provide a seamless shower experience.
Tools and Materials Needed for Installation
To ensure a successful installation, gather the necessary tools and materials. You'll need a wrench, screwdriver, pipe cutter, and plumber's tape, among other items. The type of thermostatic mixer you've purchased may also dictate specific requirements.
Step-by-Step Installation Guide
Pre-installation Checks and Preparations
Begin by turning off the water supply to the shower. Check for any leaks or damages in the existing plumbing. Ensure that the wall is suitable for the installation and make any repairs or reinforcements if needed.
Installation Steps
- Remove the Existing Shower System
- Detach the existing showerhead, handles, and trim.
- Use a pipe cutter to remove the old pipes.
- Install the Thermostatic Mixer Valve
- Follow the manufacturer's instructions for attaching the mixer valve.
- Use plumber's tape to secure connections.
- Connect the Diverter
- Attach the diverter to the mixer valve.
- Ensure a tight seal to prevent leaks.
- Mount the Showerhead and Additional Fixtures
- Install the showerhead, handles, and any additional fixtures included with your thermostatic mixer.
- Test the System
- Turn on the water supply and test the system for leaks.
- Adjust the temperature and check the diverter for smooth operation.
Common Installation Mistakes to Avoid
- Incorrect Valve Installation: Ensure the thermostatic mixer valve is installed according to the manufacturer's guidelines to prevent malfunctions.
- Inadequate Sealing: Properly seal all connections with plumber's tape to prevent water leaks.
- Ignoring Wall Integrity: Reinforce the wall if necessary to support the weight of the thermostatic mixer and prevent damage.
Operating Instructions for Thermostatic Mixer Showers with Diverters
Once the installation is complete, understanding how to operate your thermostatic mixer shower is crucial. The diverter allows you to switch between different shower functions, such as rainfall, handheld, or body jets. Simply turn the diverter handle to select your desired option.
Maintenance Tips for Longevity
To ensure your thermostatic mixer shower remains in top condition:
- Regularly clean the showerhead to prevent clogs.
- Check for any loose connections and tighten as needed.
- If you notice a drop in water pressure, clean the diverter and valve to remove any debris.
Benefits of Using Thermostatic Mixer Showers with Diverters
Thermostatic mixers offer several advantages:
- Consistent Temperature: Enjoy a steady water temperature throughout your shower.
- Safety Features: The anti-scald feature protects against sudden temperature changes.
- Versatility: Easily switch between different shower functions using the diverter.
Comparing Thermostatic Mixers with Traditional Showers
Unlike traditional showers, thermostatic mixers provide:
- Energy Efficiency: Thermostatic mixers save energy by maintaining a constant temperature without the need for constant adjustments.
- Enhanced Safety: The anti-scald feature reduces the risk of burns or discomfort during showers.
Customer Reviews and Experiences
Users appreciate the ease of installation and the customizable shower experience. Some have mentioned the significant impact on energy bills due to the efficient use of water and energy.

Industry Trends in Thermostatic Mixer Showers
Recent advancements include smart thermostatic mixers with Wi-Fi connectivity, allowing users to control their showers remotely. Future trends may focus on even greater energy efficiency and eco-friendly materials.
Environmental Impact of Thermostatic Mixer Showers
Using a thermostatic mixer with a diverter contributes to environmental sustainability. By maintaining consistent water temperature, these showers reduce water wastage, promoting both energy and resource conservation.
Discover the epitome of shower luxury with a thermostatic mixer shower featuring a convenient switch for versatile functionality. This article will guide you through the seamless installation and optimal usage of a thermostatic mixer shower with a switch, ensuring a personalized and comfortable shower experience.
Installation Guide for Thermostatic Mixer Shower with Switch
Gather the Essential Tools
Before embarking on the installation journey, ensure you have the necessary tools at your disposal:
- Screwdriver
- Adjustable Wrench
- Pipe Cutter
- Pipe Thread Tape
- Silicone Sealant
- Spirit Level
- Drill
- Wall Plugs and Screws
Step-by-Step Installation Process
- Turn Off the Shower Water Supply: Begin by shutting off the water supply to the shower to ensure a safe installation process.
- Remove the Old Shower Mixer: Take out the existing shower mixer to make way for the upgraded thermostatic version.
- Cut Pipes to the Right Length: Utilize the pipe cutter to trim the pipes to the appropriate length for the new installation.
- Seal Pipes with Pipe Thread Tape: Apply pipe thread tape to seal the pipes securely, preventing any potential leaks.
- Install the New Thermostatic Mixer Shower: Mount the new thermostatic mixer shower in place, ensuring a snug fit.
- Seal Around the Mixer: Use silicone sealant to seal the area around the mixer, providing added protection.
- Attach the Switch: Install the switch to enable seamless transitions between different shower functions.
- Test the Shower: Conduct a thorough test of the shower to confirm that all components are functioning optimally.
Efficient Utilization of Your Thermostatic Mixer Shower with Switch
Now that your thermostatic mixer shower with a switch is successfully installed, follow these steps for an enhanced shower experience:
- Turn on the Faucet: Open the tap to allow water into the shower, preparing for a relaxing experience.
- Switch Between Shower Functions: Rotate the switch to choose from various shower functions, such as a fixed showerhead or a handheld shower.
- Adjust Temperature with the Thermostatic Mixer: Achieve the perfect water temperature by adjusting the thermostatic mixer, ensuring your comfort.
Experience the epitome of shower indulgence with the seamless installation and user-friendly features of a thermostatic mixer shower with a switch. Upgrade your daily routine and enjoy the luxury of a personalized shower experience.


Comments
Post a Comment