How Long Does It Take to Install a Loft Ladder?
Loft ladders are a fantastic addition to any home, offering easy access to often underutilized spaces. Whether you're aiming to create additional storage or simply want a convenient way to reach your loft, installing a loft ladder is a practical and efficient solution. In this article, we'll explore the various aspects of loft ladder installation, answering the burning question: How long does it take to install a loft ladder?
Loft ladders have become increasingly popular due to their ability to maximize space and improve accessibility to the loft area. As more homeowners embark on loft conversion projects or seek to enhance storage options, understanding the time it takes to install a loft ladder becomes crucial.
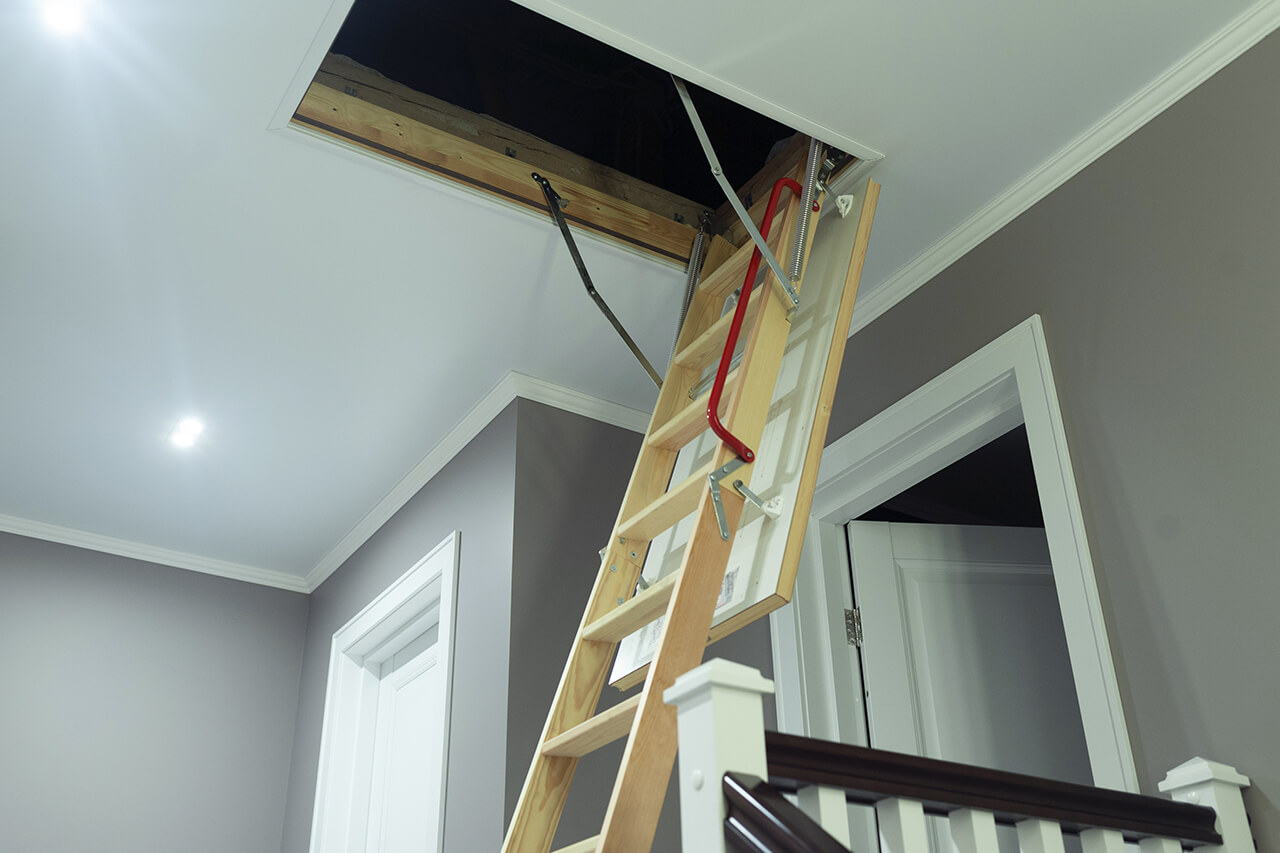
Types of Loft Ladders
Before diving into installation times, it's essential to recognize the different types of loft ladders available. Folding ladders, sliding ladders, and telescopic ladders each come with their unique features, influencing the installation process.

Factors Affecting Installation Time
The time required to install a loft ladder is influenced by several factors. The type of ladder chosen, the complexity of the installation, and the decision between DIY and professional installation all play a role in determining the overall time commitment.
DIY vs. Professional Installation
For the avid DIY enthusiast, installing a loft ladder might seem like a rewarding project. However, it's essential to weigh the pros and cons of DIY installation against the benefits of hiring a professional.
Tools and Materials Required
Whether you choose the DIY route or opt for professional installation, there are specific tools and materials you'll need to ensure a smooth process. From basic hand tools to specialized equipment, having the right gear is crucial.
Step-by-Step Installation Guide
Let's break down the installation process step by step, covering everything from pre-installation preparations to attaching ladder sections and essential safety precautions.
Pre-installation Preparations
Before you start, ensure you have all the necessary tools and materials. Clear the loft space for easy maneuverability and follow the manufacturer's instructions carefully.
Installing the Loft Ladder Frame
The first step involves installing the frame, which serves as the foundation for the ladder. Secure the frame in place according to the provided guidelines.
Attaching Ladder Sections
Once the frame is in place, attach the ladder sections. This step varies depending on the type of ladder chosen. Folding ladders may require unfolding and securing each section, while sliding ladders need careful alignment.
Safety Precautions
Prioritize safety throughout the installation process. Use appropriate safety gear, work with a partner if possible, and follow guidelines to avoid accidents.
Time Estimates for Different Types
The time it takes to install a loft ladder varies based on the ladder type.
Average Installation Time for Folding Ladders
Folding ladders are known for their simplicity. On average, a DIY installation can take anywhere from 2 to 4 hours, while professionals may complete the task in around 1 to 2 hours.
Time Required for Sliding Ladders
Sliding ladders involve a bit more complexity. DIY enthusiasts should allocate 4 to 6 hours for installation, whereas professionals can often finish within 2 to 3 hours.
Telescopic Ladders and Their Installation Duration
Telescopic ladders, with their adjustable design, typically take 3 to 5 hours for DIY installation. Professionals may complete the task in 2 to 4 hours.
Tips for Quick Installation
Regardless of the ladder type, there are several tips to expedite the installation process.
Efficient Organization of Tools and Materials
Organize your tools and materials before starting the installation. This ensures a smooth workflow and minimizes interruptions.
Working with a Partner
If possible, enlist the help of a friend or family member. Having an extra set of hands can significantly speed up the process.
Following Manufacturer Instructions
Adhering to the manufacturer's instructions is crucial. Skipping steps or taking shortcuts can lead to errors that may require additional time to rectify.
Real-Life Installation Experiences
To provide a realistic perspective, let's explore real-life installation experiences shared by homeowners.
Customer Testimonials on Installation Times
Many DIY enthusiasts express satisfaction with the straightforward installation of folding ladders. Professionals receive praise for their efficiency and precision.
Challenges Faced and How They Were Overcome
Some individuals encountered challenges, such as alignment issues with sliding ladders. However, following troubleshooting advice and seeking professional assistance resolved these issues.
Common Mistakes to Avoid
To ensure a smooth installation, it's essential to be aware of common mistakes.
Pitfalls in DIY Installations
DIY installers occasionally face challenges with measurements and alignment. Taking accurate measurements and carefully following instructions can prevent these issues.
Professional Errors to Watch Out For
While professionals are generally adept, occasional errors may occur. Communication is key to addressing any concerns and ensuring a satisfactory outcome.
Maintenance Tips
Once your loft ladder is installed, proper maintenance is crucial for longevity.
Ensuring Longevity of Your Loft Ladder
Regularly inspect the ladder for any signs of wear or damage. Lubricate moving parts as recommended by the manufacturer.
Regular Checks and Repairs
Promptly address any issues to prevent further damage. Regular checks and minor repairs can extend the lifespan of your loft ladder.
Cost Considerations
Understanding the cost implications of loft ladder installation is vital.
Budget-Friendly Options for Installation
DIY installations are cost-effective, requiring only the purchase of materials. Professional installations come with a service fee, but the convenience may outweigh the cost for many homeowners.
Professional Installation Costs
Professional installation costs vary but typically range from $200 to $500, depending on the complexity of the job.
Benefits of Having a Loft Ladder
The time invested in installation is well worth the benefits.
Increased Storage Space
Accessing your loft adds valuable storage space to your home, reducing clutter in living areas.
Accessibility to the Loft Area
A loft ladder provides easy access to your loft, turning it into a functional and accessible space.
Value Addition to Your Property
The addition of a loft ladder enhances the overall value and appeal of your property, making it an attractive feature for potential buyers.
Conclusion
In conclusion, the time it takes to install a loft ladder varies based on factors such as the ladder type and installation method. DIY enthusiasts can enjoy the satisfaction of completing the project themselves, while those preferring a quicker and hassle-free process may opt for professional installation.
FAQs
How long does a DIY installation typically take?
The time for a DIY installation varies but generally falls between 2 to 6 hours, depending on the ladder type.
Are professional installations always faster?
Yes, professionals typically complete installations faster, often within 1 to 4 hours, depending on the ladder type.
Can I install a loft ladder alone?
While it's possible, having a partner can make the process smoother and safer.
What is the average cost of professional installation?
Professional installation costs range from $200 to $500, depending on factors like complexity and location.
Are telescopic ladders harder to install?
Telescopic ladders may require a bit more time and precision, but with careful following of instructions, they can be installed effectively.


Comments
Post a Comment